
I’ve played 17 matches since my introductory post which you can read here and I’m now approaching the winter break. My squad suffered the injuries that I predicted in the aforementioned post but I’ve managed to maintain good form overall and I’m sat 2nd in the league just two points behind Barcelona.
I’ll be focusing on a Europa League match for this post though, in which we’d already qualified as the group winners. This was the final match of the group stage, and due to the fact I’d already topped the group, it wasn’t really important so I heavily rotated my side. Those that read my last post will know that my squad depth is awful, so most of the players that came in for this tie against Marseille will be sold sooner rather than later.
However, I still wanted to win of course and after studying the opponent I knew how I wanted to attack.
Analysing the Opponent
You’ll see this a lot if you’re going to follow my posts, as it’s something I do before every match and it makes use of one of the best new features in this year’s edition of the game. Below you’ll see the opposition overview that I saw before facing the opponent in question, Marseille.
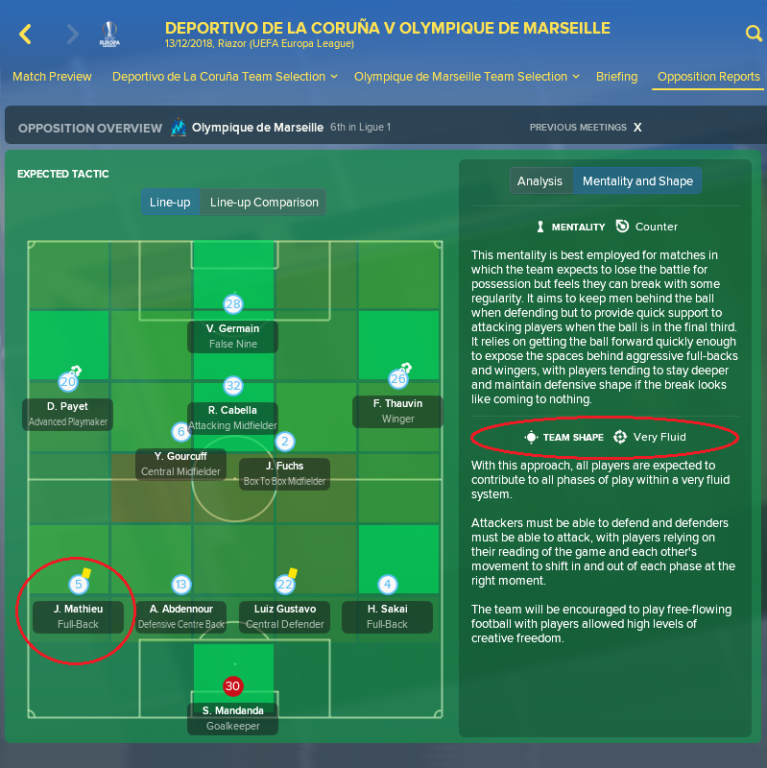
This overview allows me to understand rough movements that the opposing players will make, as well as how they’ll act as a team both in attack and defence. There’s a wide variety of things I can take from this, but two aspects particularly caught my attention, both of which I’ve circled red.
Firstly, I noticed that Marseille played using Very Fluid, which I don’t often see certainly based on the teams I’ve faced in FM18. This told me that Marseille were going to be very compact, with close and congested spacing between teammates and around the ball, regardless of where my players positioned themselves. Now with that knowledge, I knew that Marseille would shuffle over as a team to the side of the pitch that the ball was on more so than normal, so my joy would come by quickly attacking the side that Marseille left vacant. Thus, I knew I was going to attack by playing through both or at least one of the wide areas.
So, I then looked at Marseille’s full-backs and Jeremy Mathieu was the clear weak link, as pictured below.
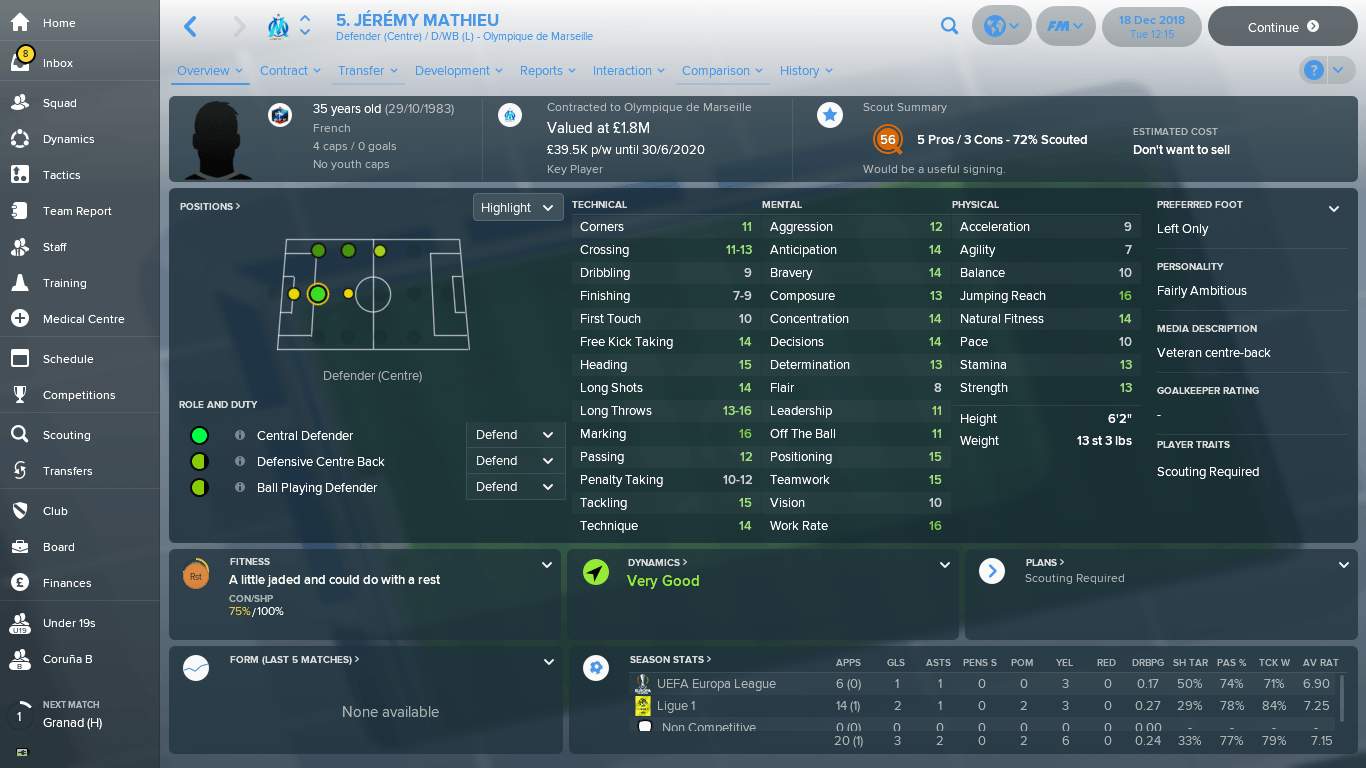
He’s being played out of position and his speed is non-existent, which is problematic when paired with Very Fluid, so I decided his flank was the area that I was going to target.
How I Adjusted
Once I’d determined how I was going to attack, I had to adjust my system accordingly so that the idea would play out in the match engine. Below, you’ll see a GIF of my setup before and after I’d made the necessary alterations.
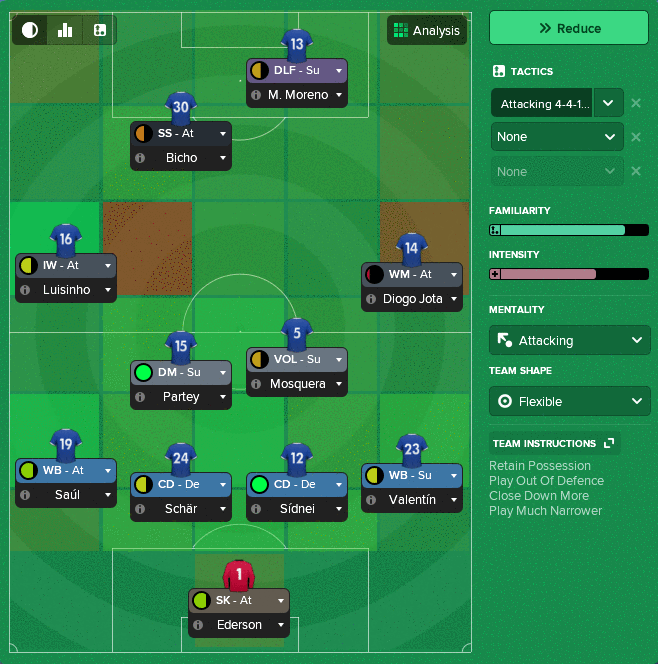
As shown in the image, I’ve changed just three things from my usual system and these are:
- Added Exploit Right Flank – I added this TI for three reasons. Firstly, so that the right flank would be played through more often. Secondly, so that the mentality of my right sided players would increase. Thirdly, so that my right sided players would position themselves wider than before.
- Changed WM (A) to AP (A) – I did this for two reasons. Firstly, because using a playmaker role results in that player attracting the ball more than other players in the match engine. Secondly, because I wanted this player to be readily positioned higher up the field so that the weakness can be quickly exploited once the ball is won.
- Changed WB (S) to FB (D) – I did this purely because Valentin is a backup player and is poor in terms of quality, so it was best to limit him. Also, his cover was needed due to how often I’d be attacking through Diogo Jota ahead of him.
I should also note that although I played a team full of backup options, I ensured that my right sided attacker was a first team regular, because obviously that player had to be good enough to exploit the targeted weakness.
The Outcome
Now, let’s look at how Diogo Jota impacted the match result, as I’ve screenshotted each significant moment with captions included underneath. For clarity, Jota’s name in the match engine is Silva for some reason & he’s the player wearing the 14 shirt.
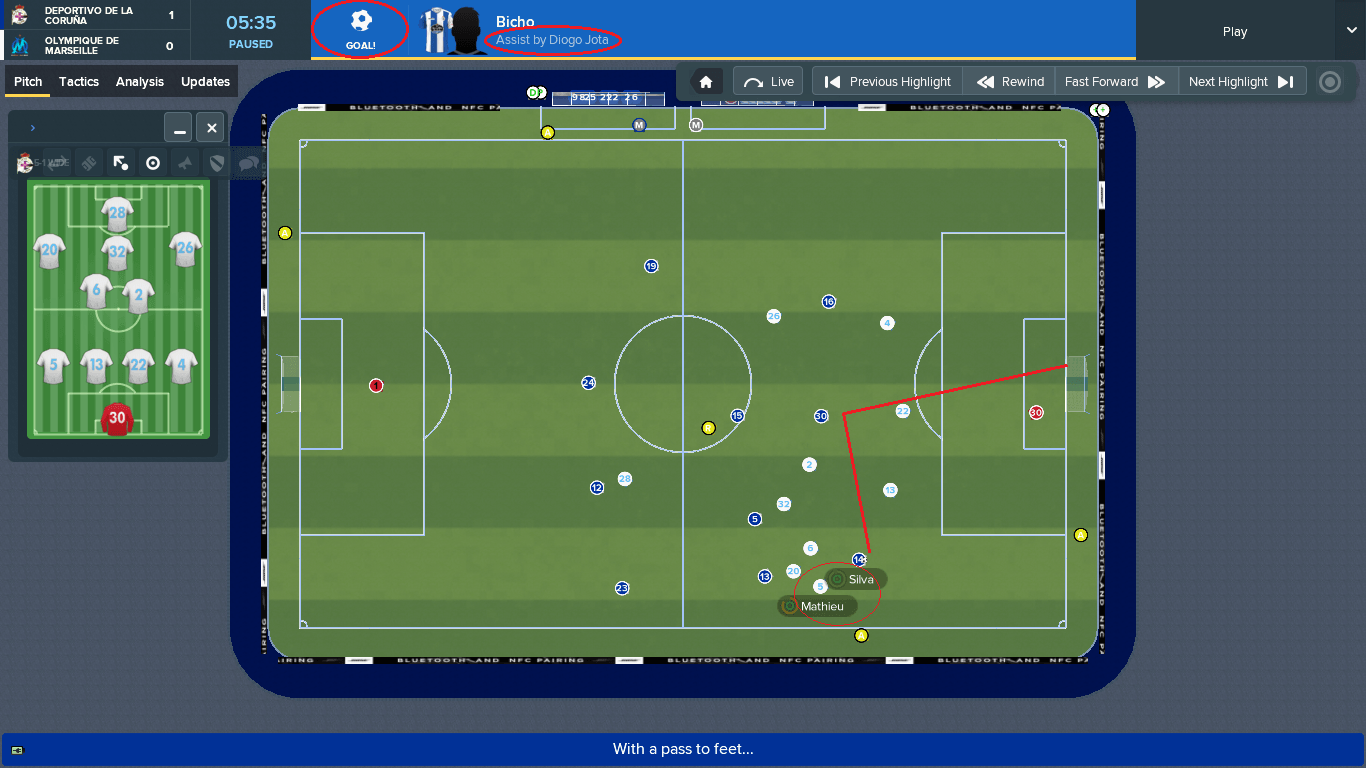
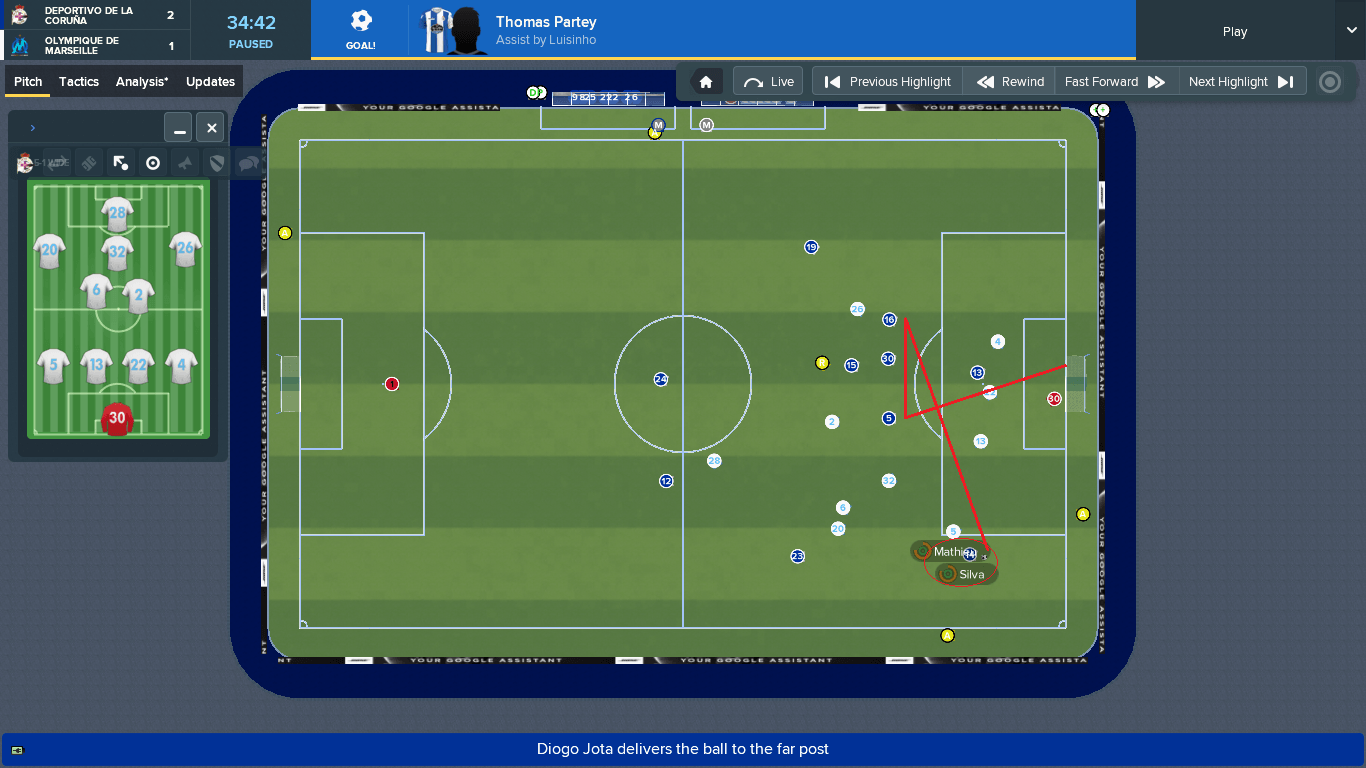
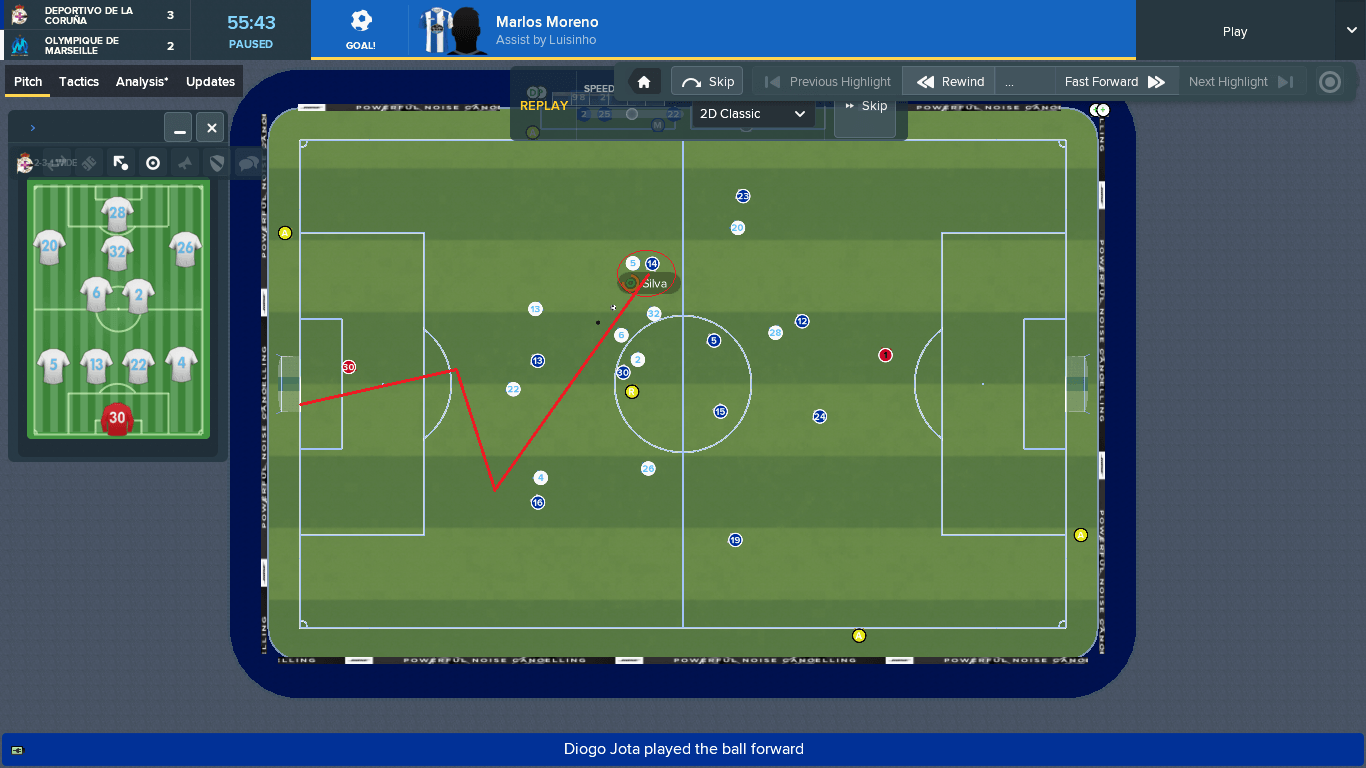
Jota’s Influence
Overall, Diogo Jota was involved in all three goals that we scored against Marseille, and pictured below you’ll see some stats from his performance that I want to highlight.
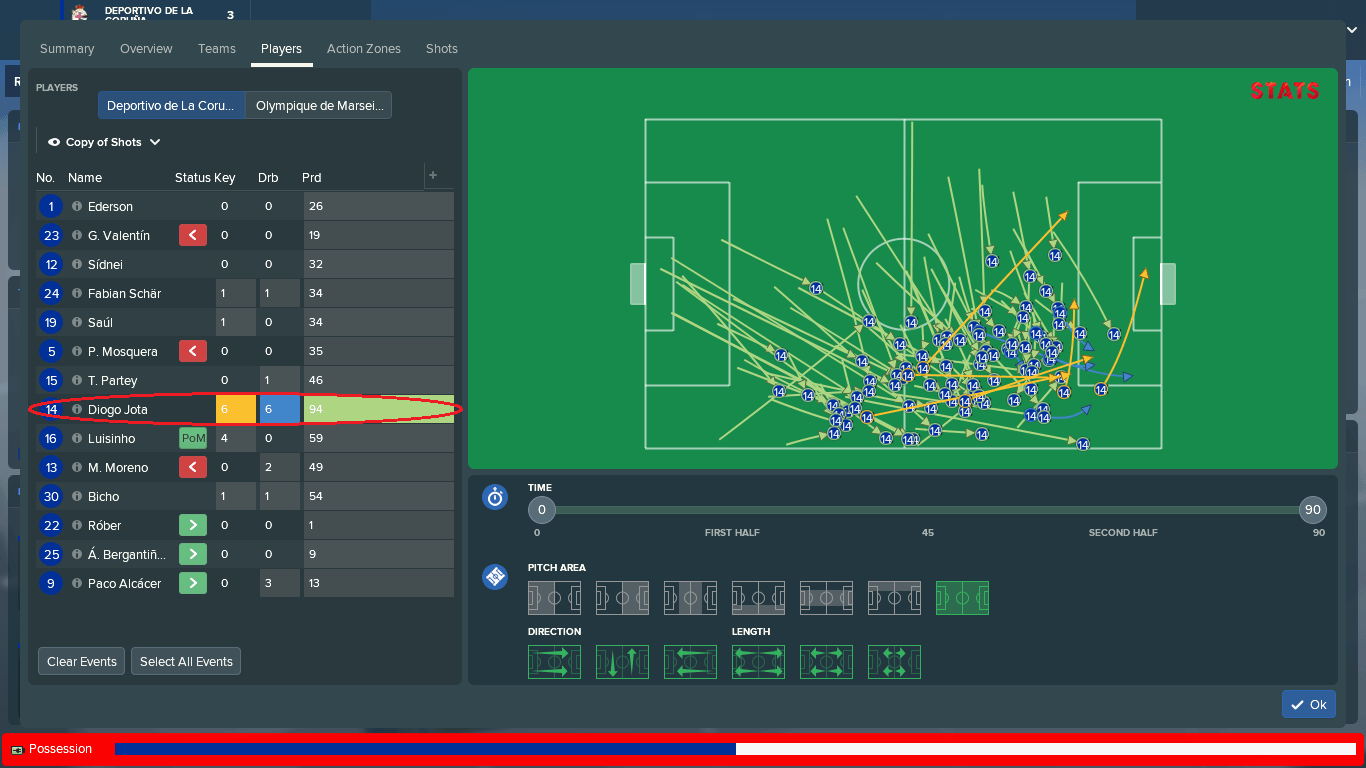
Firstly, look at his Passes Received, represented by the green arrows. Jota received the most by some distance with 94 passes in comparison Luisinho who received the second most with just 59. Clearly, Jota was utilised as much as I’d wanted.
Next, notice his Dribbles Made. Jota completed 6 dribbles on his own in comparison to the second most with 3. Finally, look at Jota’s Key Passes, as he made 6 which was once again the most on his team with Luisinho the only other player to make more than 1.
Jota ended the match with a rating of 8.6 despite not actually scoring.
Summary
I appreciate some people will approach matches differently to this, perhaps with much less emphasis on the opponent, but this is how I like to play the game. This is the type of post that I’ll be doing now that I have my own site, some may be much shorter, but I’d expect the tactical nature to be a recurring theme. Thanks for reading.

Excellent article, well illustrated will help me a lot with my Newton Heath tactics, thanks
LikeLiked by 1 person
Thanks mate. Glad you liked it. Let me know how you get on.
LikeLike